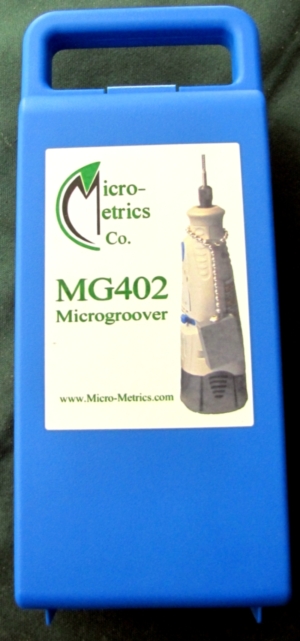
MG402 Microgroover
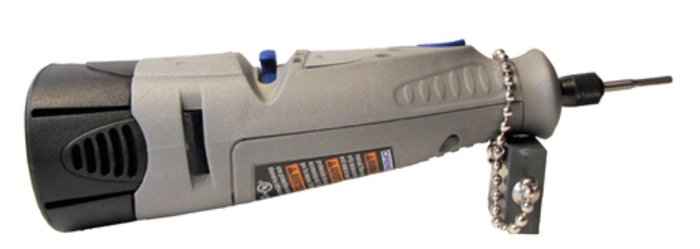

The Microgroover is the major accessory tool for creating coating incisions for film thickness measurements with the Tooke® Paint Inspection Gage. This tool greatly extends the range of the measuring technique to include almost any coating on any substrate. The Microgroover adaptation utilizes drill-like grinder tips for groove cutting operations (cylindrical face cutting).
The Microgroover is especially effective on hard and brittle (concrete) materials, as well as soft or elastomeric (rubber) substances. In addition, fibrous composites are incised easily and cleanly. Aside from film thickness measurements, small-scale operations of cutting, grinding, sawing, and polishing can be performed with this useful cordless power tool.
Setting up the Microgroover
The tip should extend from the mouth of the chuck by
exactly 1-7/64" (28.2mm).
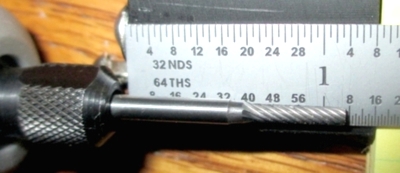
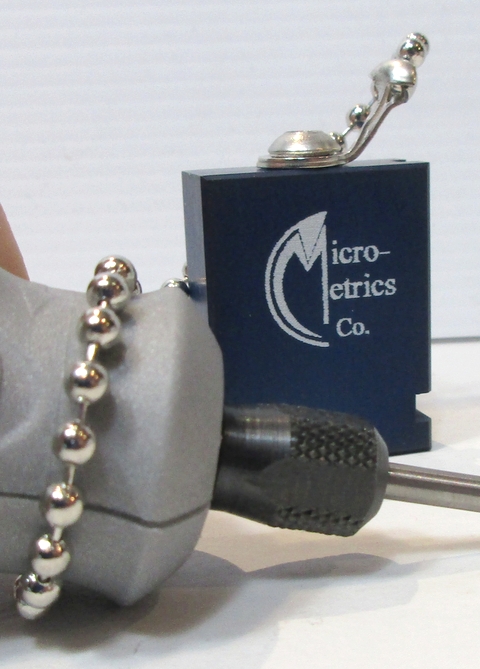
New positioning block
Loosen and slide the cutter into the groove so it
touches the end-stop and the collet rests against the
opposite end. That extends the cutter 1-7/64" (28.2mm).
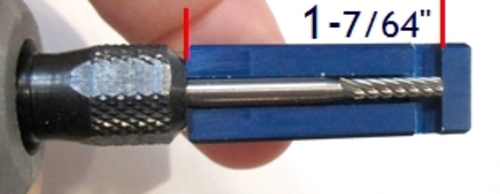
The new positioning block allows easy setting of the cutter.
It has a groove and stopper on the side that is 1-7/64" (28.2mm)
Operation
The Microgroover is a high-speed rotary tool for creating the small, almost microscopic, incisions required for measurements with the Tooke Paint Inspection Gage. This technique completely eliminates the deformations of coating and substrate which may occur when conventional gage cutting tips are used.

The high-speed cutter, usually with either tungsten carbide or diamond-studded surfaces, “erodes” away surface material in a precise pattern, leaving adjacent and underlying areas totally undisturbed. Hard, brittle, tough, fibrous, tender, or elastomeric materials exhibit clean, non-tearing, controlled disintegration under the rotary cutter.
For precise and rapid measurements, a “drum mode” of cutting was developed. In this mode the grinder is fitted with the No. 9902 tungsten carbide cutter (or equivalent) installed in a precise position. With the round rim (“flange”) of the Microgroover in continuous contact with the work surface or positioning block, the unit is pivoted until the tip contacts the surface. A light touch with the rotating tip creates the required incision.
Using the Microgroover in the 2X position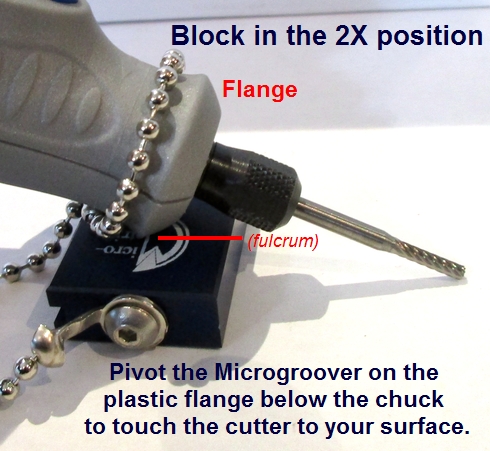
The cutting angles (slopes) of 1X, 2X and 4X are accomplished by using the positioning block to elevate the contact shoulder of the Microgroover as required. The required shoulder elevations are as follows:
| Cutting angle | Shoulder Elevation |
|---|---|
| 1X | 0.97" (block resting on narrow face) |
| 2X | 0.41" (block resting on wide face) |
| 4X | Block not used |
Using the Microgroover in the 1X position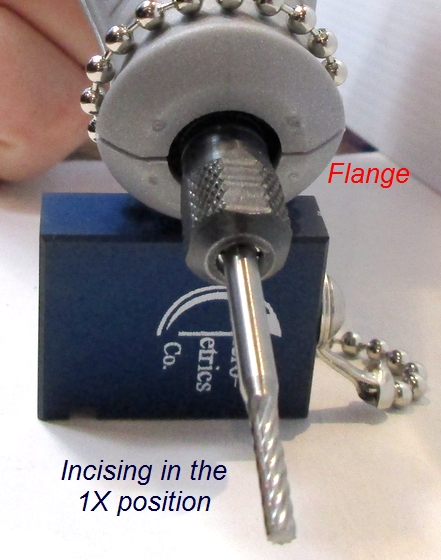
Using the Microgroover in the 4X position 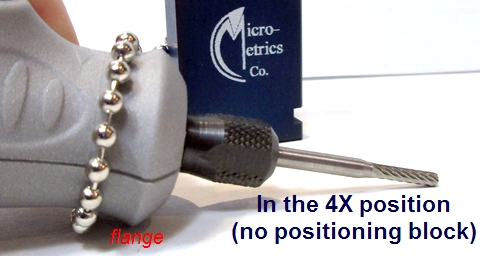
Principle: reading the incision
Very sorry for the multiple reticle versions and the attendant confusion: it took eight years to get the custom-designed, custom-manufactured Dual-Measure reticle/scopes into production. They match (but are also easier to read!) the old-style English unit and metric unit scopes. Alas, the now-discontinued universal scopes measure completely differently (50µm per hash) from the older metric and new Dual-Measure reticles (both 20µm per hash). The universals were a necessary interim version after the source for the old-styled, green-anodized-barrel scope ceased making them). Please check the Micro-Metrics website for information on the Dual-Measure Scope Swap and Body Transplant program options.
When the MG402 Microgroover incision is examined with the Tooke Paint Inspection Gage microscope, it will appear as a partial cylindrical cavity, with the cavity wall angling gradually upward to the paint surface. Where the wall of the cut penetrates the substrate surface, the paint film above it describes a crescent shape, see the drawing below. The thickness is read axially across the thickest part of this shape.
The thickness for the 1X, 2X, or 4X position of the Dremel on the positioning block will be the number of hashmarks counted divided by 1, 2, or 4 respectively, and multiplied by the measurement units of the inspecting reticle of each hashmark space: 1 mil; 20µm, or 50µm.
Microgroover incision diagram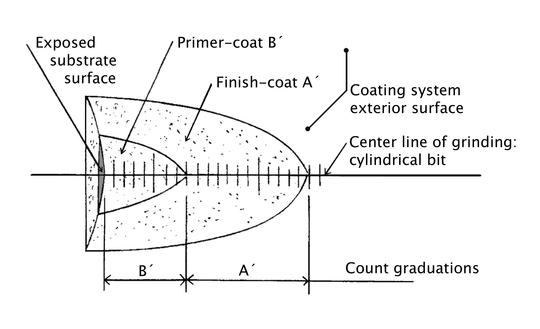
The view through the universal scope of the cylindrical cavity abraded by the
Microgroover. Substrate out of focus at left; bluish primer, gold-colored topcoat,
and the black marker showing the top of the top coat.
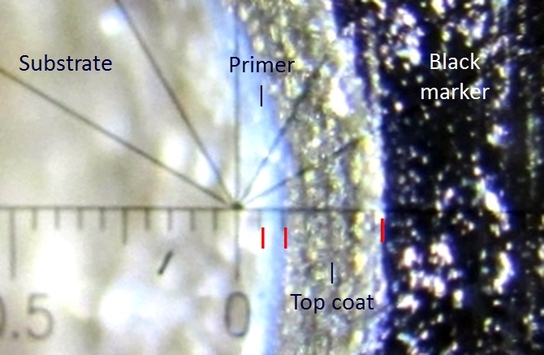
(Important note: the calculated size of the hashmark space is different depending on which scope is used for reading the incision: the new Dual-Measure reticle scope, the discontinued universal metric-reticle scope, or the old-style (green-anodized barrel) U.S. standard-unit or metric-unit reticle.)
A measuring demonstration
| New Dual-Measure scope and both | (Discontinued) | |
|---|---|---|
| Old-style U.S. standard-unit reticle |
Old-style metric-unit reticle |
“Universal” scope: metric-unit reticle |
| 1 mil (0.001”) | 20 microns (20µm) | 50 microns (50µm) |
Annotated detail view (Dual-Measure reticle) of the cylindrical cavity abraded
by the Microgroover. Red marks denote where to count the hashmark spaces.
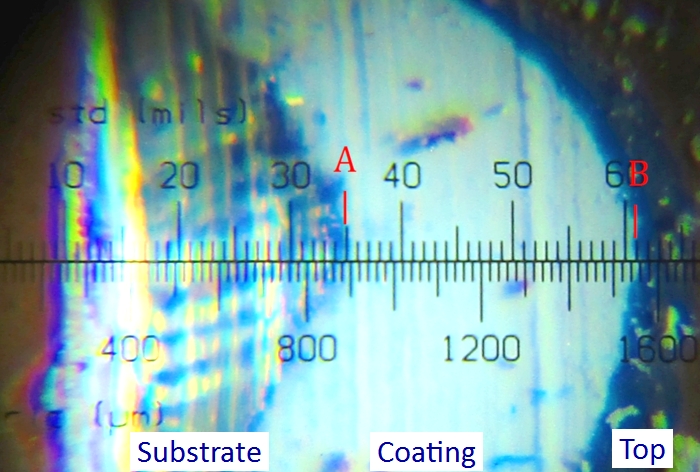
The view in the photo above is through the new Dual-Measure reticle. There are 26 hashmark spaces between markers A and B on the U.S.-standard (top) line and ~33 hash using the (bottom) metric line. Each hashmark space on the top line is 1 mil. Each hashmark space on the metric line is 20µm.
(The photo above this measuring demo section’s heading shows a different view through a universal reticle: in the universal reticle, each hashmark space is 50µm.)
| Cutting angle | Shoulder Elevation | Divide counted hashmarks by |
|---|---|---|
| 1X | 0.97" (block resting on narrow face) | 1 |
| 2X | 0.41" (block resting on wide face) | 2 |
| 4X | Block not used | 4 |
Remember, if you are using the universal scope you will divide number of hashmark spaces by the position block position, then multiply that number by 50µm; not the 20 microns of the Dual-Measure reticle or old-style metric-unit reticle.
Using the 1X block position
- Using either the Dual-Measure scope or old-style U.S. standard-unit reticles: To your determine coating depth in mils, count your hashmarks; that number is your coating depth in mils (because each hash = 1 mil). In the example photo, the 26 hash shows your coating is 26 mils thick.
- Using either the metric line in the Dual-Measure scope or old-style metric-unit reticles: If you’re measuring in µm, the ~33 hashmark spaces you counted is multiplied by the 20µm per hash. So, the 33 hash × 20µm = 660µm.
- Universal scope reticle: The universal scope will not show ~33 hashmark spaces, because each hashmark space in that scope is 50 microns. So, the number of hashmark spaces you count is multiplied by the 50µm per hash.
Using the 2X block position
- Using either the Dual-Measure scope or old-style U.S. standard-unit reticles: To your determine coating depth in mils, you count your hashmarks and first divide that counted number by 2 (because of the 2X block position). In the example photo, the 26 hash, divided by 2, makes your coating 13 mils thick (each hash = 1 mil divided by block position 2).
- Using either the metric line in the Dual-Measure scope or old-style metric-unit reticles: If you’re measuring in µm the ~33 hashmark spaces you counted is first divided by 2, then multiplied by the 20µm per hash. So, the 33 hash × 20µm = 660µm.
- Universal scope reticle: The universal scope will result in a different count, because each hashmark space in that scope is 50µm. So, whatever number of hashmark spaces you count through the universal scope is first divided by 2 (because of the 2X block position), then multiplied by 50µm.
Using the 4X block position
- Using either the Dual-Measure scope or old-style U.S. standard-unit reticles: If you use the 4X block position (i.e., NO block, just the shoulder of the Dremel) to make the abrasion, you would divide the number of hashmark spaces (26) by 4. So your count hashmarks (26), divided by 4 is 6.5, times either the 1 mil, the 20µm.
- Using either the metric line in the Dual-Measure scope or old-style metric-unit reticles: If you’re measuring in µm the ~33 hashmark spaces you counted is first divided by 4, then multiplied by the 20µm per hash. So, the 33 hash divided by 4 (8.25) × 20µm = 165µm.
- Universal scope reticle: The universal scope will not count ~33 hashmark spaces, because each hashmark space in that scope is 50 microns. So, whatever number of hashmark spaces you count through the universal scope is first divided by 4 (because of the 4X block position: NO block), then multiplied by 50µm
(It is much easier to see the hashmark lines with the human eye; the current photos are mediocre at best. Please note that until the Tooke Gage camera adapter is designed, manufactured, and made available, these pictures are taken holding an instamatic-type camera over the scope; so the quality … just isn't.)
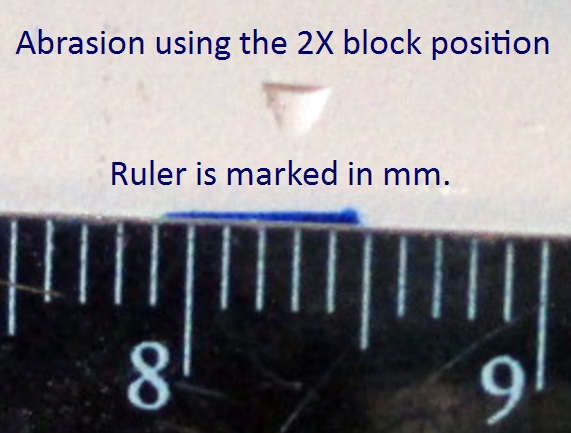
This is the abrasion made with the 2X block position.
It’s white (latex) paint on a white MDF board.
Shipping specifications
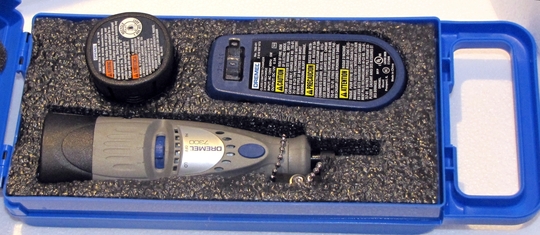
The grinder unit is the Dremel Minimite® Model 7300 Cordless Rotary Tool. It comes in a polypropylene plastic carry case, complete with two batteries, a charger, and a technical data sheet; and with special accessories for grooving operations (attached positioning block and MG402-02 grinding tip). An optional conical grinding tip (MG402-09) is available. The grinder is powered by rechargeable Ni-Cad batteries in a removable battery pack. A full charge should suffice for 100 or more measurements. The charger will completely recharge in three hours.
| Grinder Unit | Dremel 7300 MiniMite® Cordless Tool |
| Motor | 4.8 volt DC; 5/10 thousand RPM |
| Carry case | Polypropylene plastic, 5" x 12" x 3" (137mm x 308mm x 76mm) |
| Supplied tip | MG402-02 cylindical grinding tip |
| Battery Pack | Plugs into bottom of grinder or charger |
| Charger | Plugs into 110 volt AC outlet |
| Accessories | Various bits and positioning block |
| Shipping Weight | ~2 pounds (77kg) |
The MG402 ships with installed bit and positioning block in the plastic carry case.
The unit also comes with a battery charger and a spare battery.
(The positioning block is carried beneath the top collar of the device.)
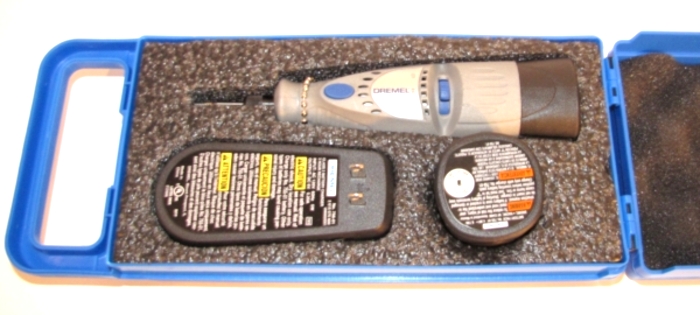
The carry case is available separately, if you
have a Microgroover and want the new case.
